Erase your harddisk
|
Dansk version
The author of this article does not assume any responsibility neither directly nor implied as a consequence of that information in this article is being used. The use of the information is completely at your own risk. If the instructions are followed, data will be lost! A lot of computers today are delivered with a socalled recovery partition, i.e. an area on the harddisk that contain files for recreating the state of the computer at the time of delivery. There are two issues with the recovery partition that need to be clear. One is that if you use the recovery function, the data on the system are deleted, so that Windows will no longer be able to find them - but they are not completely gone! It is possible with relatively simple methods to recover them, to the extent that they are not overwritten (see below). The other is that if you follow the instructions in this article, the recovery partition will also be deleted, so if you want to use the recovery function later, you must make a backup of it according to the instructions supplied by the manufacturer, BEFORE you venture into the below described. Many people want to make sure that all the things they have saved on their harddisk do not fall into the wrong hands when the computer is going to be sold, given away or thrown away. If you think there a bit more 'life' in a computer, it is a good and environmentally friendly idea to hand it over to someone else - and computers offered for sale online are increasingly without harddisk, solely because the seller does not know how to make sure data is gone. NSA, USA's most secret organisation, did a few years ago, together with Center for Magnetic Recording Research at University of California San Diego, establish that when a harddisk has been overwritten just once, it is in practise impossible to recover data (read a description here). It is theoretically possible to reconstruct data by photographing each (512 bytes) sector by electron microscope and read data 'manually' (heat makes the disk gradually expand and thus the write head will not position itself exactly right on the track every time), but not only has data density increased significantly since this theory was put forward, it will be both an extremely laboreous and expensive work to carry out - a work, that should equal the value of the information you want to recover. For all intents and purposes, when data is overwritten, it's gone. What is needed is a method to write 'something' to every place in every sector on the harddisk. I will here describe a method, that requires very little technical insight and that is most effective. Furthermore it can be applied without disassembling the computer, which most users would probably consider a benifit. Method one - down and dirty (and good), but no control- Recommended for all usersDownload Darik's Boot and Nuke (DBAN). Burn it to a CD or DVD (if you need a program to burn image-files with, one for Windows can be found here). Insert the disk into your CD or DVD drive and start the computer. If it is set up to start from CD or DVD, it will boot to a menu, and here you can either type 'autonuke' (and press <Enter>) to let the tool find and erase your disk on it's own or you can just press <Enter> to get a menu with more options. You only need one pass of overwriting data, as described above. One pass of overwriting will take about one hour per 10 GB. Method two - faster, with good control- Recommended for most users, with the need for more controlThe tool that is needed here is the program dd, which is found in most Linux distributions, and there even exists a version for Windows. Unfortunately it is not possible to run dd from the installed Windows on the computer, and thus a socalled Linux Live-CD is needed. The best suited is Knoppix, because it can recognize and boot on almost any kind of hardware - i.e. practically any kind of computer. Knoppix has - similar to most other operating systems - grown because we - the users - want more and more functions. That means that the latest version, that will fit on a CD is 6.2.1 - it can be downloaded here from the folder 'knoppix'. The latest version, as of the writing of this document, is 6.4.3, and it can be downloaded at the same place from the folder 'knoppix-dvd'. It doesn't matter if you choose the german (DE), the english (EN), the older or the newer version. Get either of them and burn it onto a CD or DVD (if you need a program to burn image-files with, one for Windows can be found here). Put the disk in the CD or DVD drive and start the computer. If it is set up to start from CD or DVD, it will after a short time get to a picture of a Leonardo DaVinci-inspired penguin and a prompt where is says boot: Begin typing before long, otherwise the disk will start on its own. Type: knoppix lang=en xkeyboard=en and press <Enter> 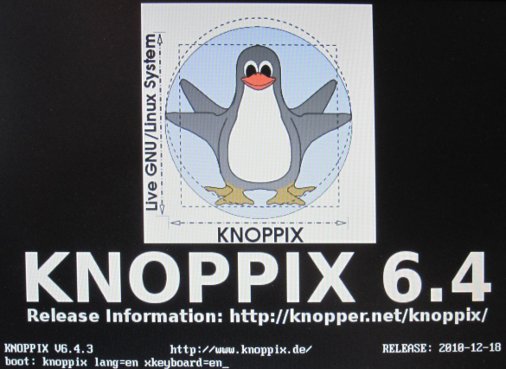
With more that 99% likelyhood, the computer will start Knoppix and automarically load a graphical user interface (Compiz) - one that is very similar to Windows. As an example, the 'Start' button is at the same place, even if it looks different - at the lower right corner. Click it and choose 'Preferences' and 'Root shell'. Now a good, oldfashioned DOS-like window appear. It's called a terminal window, and it is a proven and powerfull concept - don't be scared by the fact that you will have to initiate the program yourself, it's really simple. Before you can get going, you need to find out what Knoppix has called your harddisk. There are not many possibilities, so you can relatively easy try one and all. Make sure you type in the terminal window - that it is chosen and active - and type: fdisk -l /dev/sda and press <Enter> (fdisk <minus> <L>) If nothing happens, try the ones listed below (a good trick is to press <up-arrow>, because then the latest entered command will show up and you just need to change 'a' to 'b', etc.): fdisk -l /dev/sdb and press <Enter> or fdisk -l /dev/sdc and press <Enter> or fdisk -l /dev/sdd and press <Enter> or fdisk -l /dev/hdaand press <Enter> or fdisk -l /dev/hdb and press <Enter> or fdisk -l /dev/hdc and press <Enter> or fdisk -l /dev/hdd and press <Enter> At some point fdisk will return a lot of information, among others, the size of the disk, and now you know what the disk is called. For the remainder of the text it will be called '/dev/sda', but you, of course, will have to type whatever name you found with fdisk. 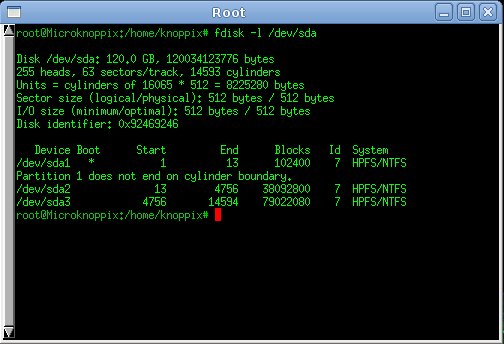
Now for the more serious part: Untill now, neither the system nor the harddisk have been affected by the activity. If you write the next command and press <Enter> your data will vanish. For ever. The next command will delete ALL data on the disk. When the next command is run, by pressing <Enter>, the data on the disk will dissappear for good! You have been warned - data cannot be recreated if you run the dd-command! Type - knowing that data is irreversibly lost - in the terminal window: dd if=/dev/zero of=/dev/sda bs=1048576 and press <Enter> (and then your data dissappear!) dd is fed three parameters; if is 'input file' and /dev/zero is chosen, that will generate all zeros, of is 'output file', and here the name of the harddisk found is entered and finally bs is 'block size' set at 1 megabyte (1024x1024), since it will contribute considerably to the speed of the operation. When you press <Enter>, nothing will happen in the terminal window, but a lot is happening on the harddisk - it is being overwritten! Unforfunately you can't follow how far dd has gotten and with what speed it is progressing - directly. As a rule of thumb there is written 1-2 GB a minutte for older disks (IDE) and slightly faster on newer disks (SATA). It is, however, possible to follow progress indirectly, and even if it is a bit nerded, it's not difficult. This part is optional, you can just wait till dd finishes on its own. Open a new 'Root terminal' window (Start -> Preferences -> Root shell) (you're just sitting there, waiting anyway - right?) and type: ps -ef | grep dd and press <Enter> (the vertical line comes from pressing <Shift> and <\> together - <\> is situated either underneath <Backspace> or besides <Z>) Now a lot of information is displayed, where dd is highlighted, and one of the lines is the command you began running earlier, with two (usually four-digit) numbers in front. For example: root 2456 2459 /usr/bin/dd if=/dev/zero of=/dev/sda bs=1048576 The number you need is the first one, in the example above 2456. Type: watch -n 60 kill -USR1 2456 and press <Enter> (the last number is is the one you found with ps) (<minus> USR <1>) The text in the terminal window dissappear and instead some appear at the top: every 60 seconds execute kill -USR1 2456 18:06:46 2011:01:05 In the original dd-window statistics will begin to appear every minute: 34356+ in 34356+ out 3435610670 records (3G) in 129.2 seconds - 28.4 MB/s When dd finishes, it will just display a similar, final statistic and return the terminal window to a ready state. The window with the optional watch-command will find that there no longer exists a process with that particular ID (2456 in the example) next time it is triggered. Choose the window and press <Ctrl> and <C> at the same time, to stop watch. Regardless off how many windows are open, close all terminal windows. Click 'Start' og 'Log off' og 'Turn off' in the appearing window. Knoppix will now close down by itself and eject the disk in the process. The harddisk is now erased and the computer will no longer be able to start without either a Live-CD/DVD (or something similar) or an installation disk in the drive. The choice to install an operating system again is entirely yours - you can in fact install Knoppix from the disk you retrived earlier, so that something is working on the computer. If you had a Windows license with the computer, you may also install that again. © January 2011 Schiřnning Computer Service |
This page was last updated 06.01.2011